タグ: mkcert

Ubuntu 22.04にmkcertをインストール。

これを使わずとも、Ubuntu 22.04にはapt(aptitude)からインストール可能でした。

概要

  • ローカルDNSで証明書を作りたい
  • 或いはローカルホスト(127.0.0.1)をhttps化したい

場合に役立つコマンド、mkcertをインストールします。

インストール方法

aptitude (apt)によるインストール

sudo aptitude install mkcert

ローカルルート証明書を作成

  • ルート証明書の作成
mkcert -install
  • ローカルのルート証明書作成確認
ls -l ~/.local/share/mkcert/
  • rootCA-key.pem → 秘密鍵
  • rootCA.pem → ルート証明書

ホスト名に追記・修正

ファイル /etc/hosts をルート顕現で、以下のように修正します。

127.0.0.1  agnes-luce

※ Ubuntu系はホスト名に指定したIPがなぜか127.0.1.1になっています。

証明書作成

  • ディレクトリ移動
cd /hoge && pwd

任意のディレクトリに移動します。

  • 証明書作成
mkcert -key-file ドメイン名.key.$(date +%Y%m) -cert-file ドメイン名.crt.$(date +%Y%m) ドメイン名
  • 作成例
mkcert -key-file agnes-luce.key.$(date +%Y%m) -cert-file agnes-luce.crt.$(date +%Y%m) agnes-luce
Created a new certificate valid for the following names 📜
 - "agnes-luce"

The certificate is at "agnes-luce.crt.202404" and the key at "agnes-luce.key.202404" ✅

It will expire on 14 July 2026 🗓

証明書の整合性を確認

  • 証明書から公開鍵のハッシュ値を取り出す
openssl x509 -pubkey -in 証明書ファイル -noout | openssl md5
  • 秘密鍵から公開鍵のハッシュ値を取り出す
openssl pkey -pubout -in 秘密鍵ファイル | openssl md5

それぞれのハッシュ値が同じであることを確認します。

こうしてできた一式は2年半有効です。

nginxとapache連携。(リバースプロキシー&SSLアクセラレータ)

自室のサーバに専用redmineを運用するようになって半年ほど。一つの課題が浮かび上がりました。

課題

現状、

  • redmine
  • フォトアルバム
  • growi

を自宅サーバ群で運用中。Webサービスが増えるたびに「証明書更新をサーバ毎に行うのが面倒」です。ワイルドカード証明書を用いて、シンボリックリンクの張り替えで済むようにしてもなお各サーバに同じ設定を行うのは手間がかかる上にミスが生じる温床となります。

施策

そこで、既にgrowiサーバで運用しているnginxのリバースプロキシーをredmineにも拡張するようにしました。

やりたいことは以下です。(IPアドレスとドメインは便宜上です)

sequenceDiagram participant クライアント participant nginx as nginxサーバ<br> 192.168.1.30<br>abc .local participant redmine as redmine<br> 192.168.1.99<br>xyz.local クライアント->> nginx: abc.localにhttpアクセス par クライアント~nginxはhttps通信 note over nginx: httpsにリライト nginx -->> クライアント: httpsでの接続要求 and nginx~redmineはhttp通信 クライアント ->> nginx: redmineにhttpsアクセス note over nginx: SSLデコード nginx -->>+ redmine: クライアントからの要求を<br>redmine(xyz.local)に送信 redmine -->>- nginx: redmineのデータを送信 end nginx ->> クライアント:redmineからのデータを<br>abc.localとしてhttpsで送信

サクッとまとめると

  • redmineサーバのリバースプロキシーとしてnginxを利用
  • クライアント~nginxは常時SSL通信
  • nginx ~ redmineはhttp通信

これにより、SSLを導入する箇所をnginxサーバのみとします。

前提

以下を用意しています。

  1. nginxサーバ (仮IP: 192.168.1.30)
  • mkcertでローカル証明書を導入済み
  1. redmineサーバ(apacheで稼働)(仮IP: 192.168.1.99)
  2. ローカルDNSに以下を登録します。(自分の環境に読み替えます)
  3. abc.local - 192.168.1.30
  4. xyz.local - 192.168.1.99

環境

ともにUbuntu Linux 20.04系で動いています。

手順

全て管理者権限で実施します

redmineサーバでの設定(apache)

以下、ファイルを編集します。

vi /etc/apache2/sites-available/redmine.conf
ファイル内容
<Location /redmine>
PassengerBaseURI /redmine
PassengerAppRoot /var/lib/redmine
Require all granted
</Location>

Alias /redmine /var/lib/redmine/public

<VirtualHost 192.168.1.99:80>
    ServerName  abc.local
    ErrorLog /var/log/redmine/error.log
    CustomLog /var/log/redmine/access.log combined

        RewriteEngine On
        RewriteCond %{HTTP_HOST} ^abc\.local
        RewriteRule ^/$ http://abc.local/redmine/ [R]
</VirtualHost>

設定反映

a2ensite redmine.conf
apache2ctl configtest
#Syntax OKを確認
systemctl restart apache2

nginxサーバでの設定

hostsファイル追記

vi /etc/hosts
追記内容
192.168.1.30 abc.local

nginx confファイル作成

vi /etc/nginx/sites-available/redmine.conf
ファイル内容
upstream abc {
       server 192.168.1.99:80;
}

server {
        listen 80;
        server_name abc.local;
        server_tokens off;
        return  301 https://$host$request_uri;
        access_log /var/log/nginx/redmine/access.log;
        error_log /var/log/nginx/redmine/error.log warn;
}

server {
        listen 443 ssl http2;
        server_name abc.local;
        server_tokens off;
        ssl_session_timeout 1d;
        ssl_session_cache shared:SSL:50m;
        ssl_session_tickets off;
        ssl_dhparam /etc/nginx/dhparam.pem;
    #openssl dhparam -out /etc/nginx/dhparam.pem 2048 として作成します(環境によっては5分以上かかります)
        ssl_ciphers ECDHE-ECDSA-AES128-GCM-SHA256:ECDHE-RSA-AES128-GCM-SHA256:ECDHE-ECDSA-AES256-GCM-SHA384:ECDHE-RSA-AES256-GCM-SHA384:ECDHE-ECDSA-CHACHA20-POLY1305:ECDHE-RSA-CHACHA20-POLY1305:DHE-RSA-AES128-GCM-SHA256:DHE-RSA-AES256-GCM-SHA384;
        ssl_prefer_server_ciphers off;
        add_header Strict-Transport-Security 'max-age=63072000';

        ssl_certificate /etc/certs/local.crt;
       # 証明書のパスに読み替えます
        ssl_certificate_key /etc/private/local.key;
      # 秘密鍵のパスに読み替えます

        access_log /var/log/nginx/redmine/ssl_access.log;
        error_log /var/log/nginx/redmine/ssl_error.log warn;

        proxy_set_header Host $host;
        proxy_set_header X-Real-IP $remote_addr;
        proxy_set_header X-Forwarded-Host $host;
        proxy_set_header X-Forwarded-Server $host;
        proxy_set_header X-Forwarded-For $proxy_add_x_forwarded_for;
        proxy_set_header X-Forwarded-Proto https;
        proxy_max_temp_file_size 10240m;
        client_max_body_size 10240m;
        proxy_buffer_size 10240m;
        proxy_buffers 10 10240m;
        proxy_busy_buffers_size 10240m;
        proxy_redirect off;

       set $proxy_target  'abc';

       location / {
          proxy_pass http://$proxy_target;
       }
}

設定反映

ln -s /etc/nginx/sites-available/redmine.conf /etc/nginx/site-enabled/redmine.conf
nginx -t
# syntax is ok と test is successfulを確認します
systemctl restart nginx -t

確認

ローカルNWに接続されているクライアントのブラウザから

http://abc.local

にアクセスし、

  • https://abc.local/redmine の内容が出てくること
  • SSL通信ができていること

を確認します。

homebrewを用いないUbuntuへのmkcertのインストール。

前回、homebrewによるローカル証明書(mkcert)を見つけましたが、それよりも楽な方法がありましたので、メモとして残します。

actix-webでSSL/TLS通信をしてみたよ

https://qiita.com/yoshiyasu1111/items/f22a5fb640651fd22b6c

環境はUbuntu20.04です。

必要パッケージをインストール

apt install libnss3-tools

インストール

curl -s https://api.github.com/repos/FiloSottile/mkcert/releases/latest | grep browser_download_url | grep linux-amd64 | cut -d '"' -f 4 | wget -qi - \
    && mv mkcert-v*-linux-amd64 mkcert \
    && chmod a+x mkcert \
    && mv mkcert /usr/local/bin/

ローカル認証局作成

 mkcert -install

これにより、管理者ユーザでもmkcertコマンドを使えるようになったのが大きいです。

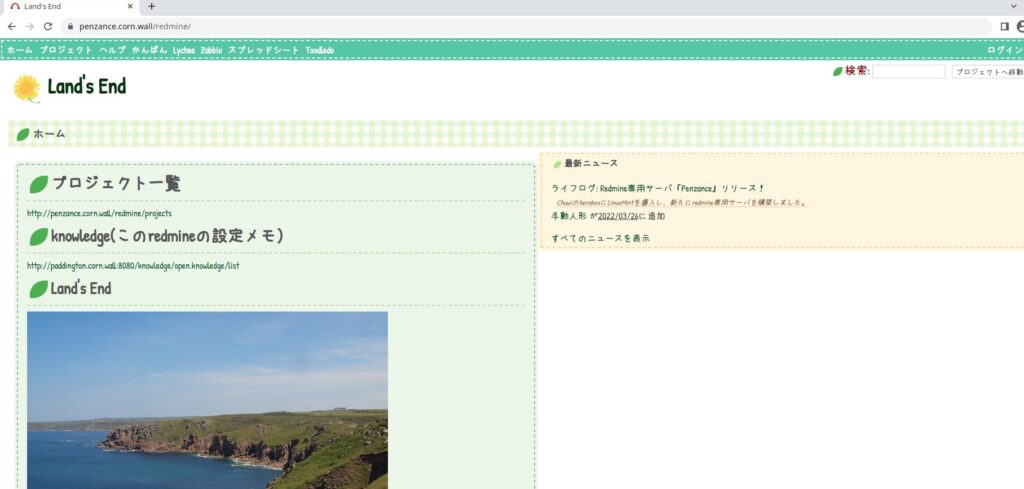
ローカルredmineのSSL化。-ローカル証明書のインストールと常時SSL化-

この記事の続きです。

ここでは、mkcertで作成したローカル証明書をredmineサーバに入れておきます。

また、

  • httpを強制的にhttpsにリダイレクト
  • http://ip or DNS名 のアクセスをhttps://ip or DNS名/redmineへとリダイレクトする

設定も同時に入れ込みます。

redmineサーバ上での設定

必要なモジュールの有効化

a2enmod ssl
a2enmod rewrite
systemctl restart apache2
ss -lntp
# 443ポートがLISTENされていることを確認します

証明書ペアの格納

mkdir /etc/certs/
mkdir /etc/private/

その後、

/etc/certs → SSL証明書

  • corn.wall.crt.202204

/etc/private/ → 秘密鍵

  • corn.wall.key.202204

をそれぞれ格納します。

証明書ペアのシンボリックリンク化

後々のメンテナンスを考えて、証明書をシンボリックリンク化します。

cd /etc/certs/
ln -s corn.wall.crt.202204  corn.wall.crt
cd /etc/private/
ln -s corn.wall.key.202204 corn.wall.key

Virtualファイル記載

cd /etc/apahce2/site-available/
cp -pi redmine.conf /path/to/backup/redmine.conf.org
vi redmine.conf
redmine.confの内容
<VirtualHost _default_:80>
 RewriteEngine On
        RewriteCond %{HTTPS} off
        RewriteRule ^(.*)$ https://%{HTTP_HOST}%{REQUEST_URI} [R=301,L]
        #http通信を強制的にhttpsにリダイレクト
</VirtualHost>

<VirtualHost _default_:443>
  SSLEngine on
    SSLProtocol All -SSLv2 -SSLv3  -TLSv1
    SSLCertificateFile /etc/certs/corn.wall.crt
    # 証明書
    SSLCertificateKeyFile /etc/private/corn.wall.key
    # 秘密鍵

        RewriteEngine On
        RewriteCond %{HTTP_HOST} ^penzance\.corn\.wall
        RewriteRule ^/$ https://penzance.corn.wall/redmine/ [R]
        # https://penzance.corn.wallへのアクセスをhttps://penzance.corn.wall/redmine/にリダイレクト

Alias /redmine /var/lib/redmine/public
CustomLog /var/log/redmine/access.log combined
ErrorLog /var/log/redmine/error.log
<Location /redmine>
PassengerBaseURI /redmine
PassengerAppRoot /var/lib/redmine
Require all granted
</Location>

</VirtualHost>

設定反映

apache2ctl configtest
# SyntaxOKを確認
systemctl restart apache2

再起動後、

  • redmineの通信がhttpsで行えること
  • ホスト名でアクセスしても/redmine/に移動すること

を確認しました。

補足とまとめ

  • セキュリティソフトによっては、このローカル認証局を「信頼できない」としてブロックする場合があります。その時はその設定を解除します。
  • また、mkcertsは開発用途なので外に出ていけないローカル環境での運用が前提です。
  • そのためか証明書の有効期限は3ヶ月。この運用をもっと楽にするのが今後の目標です

ローカルredmineのSSL化。-mkcertのインストール-

また、やりたいことに一歩近づきました。

  • 外に出ていけないローカルドメインでもSSL通信はしたい
  • 自己証明書と違った形でSSLを発行したい

という希望を求めていたら、「mkcert」なるものを発見したので、導入してみました。

redmineのSSL化

homebrewのインストール(検証機で実施する)

参考:
https://tdomy.com/2021/12/how-to-install-homebrew-on-ubuntu/

必要パッケージ取得

rootでは実行しないこと

sudo aptitude install libnss3-tools git curl

homebrewインストール

/bin/bash -c "$(curl -fsSL https://raw.githubusercontent.com/Homebrew/install/HEAD/install.sh)"
test -d ~/.linuxbrew && eval "$(~/.linuxbrew/bin/brew shellenv)"
test -d /home/linuxbrew/.linuxbrew && eval "$(/home/linuxbrew/.linuxbrew/bin/brew shellenv)"
test -r ~/.bash_profile && echo "eval \"\$($(brew --prefix)/bin/brew shellenv)\"" >>~/.bash_profile
echo "eval \"\$($(brew --prefix)/bin/brew shellenv)\"" >>~/.profile
brew --version
brew install hello
hello
brew uninstall hello

mkcertインストール

https://www.hivelocity.co.jp/blog/46149/

brew install mkcert
mkcert -install
mkcert -CAROOT
# ~/.local/share/mkcert配下にルート証明書とルート秘密鍵を確認
cd ~/.local/share/mkcert

mkcertで証明書発行

ここでは、自宅redmineに用いている

penzance.corn.wall

の証明書を発行します。

mkcert -key-file corn.wall.key.202204 -cert-file corn.wall.crt.202204 corn.wall penzance.corn.wall "*.corn.wall" 
openssl x509 -text -noout -in ./corn.wall.crt.202204 |grep DNS
# DNS:corn.wall, DNS:penzance.corn.wall, DNS:*.corn.wall と、入力したDNS名があることを確認します

次のエントリーでは、redmineにSSLを入れ込んでいきます。

Powered by WordPress & Theme by Anders Norén